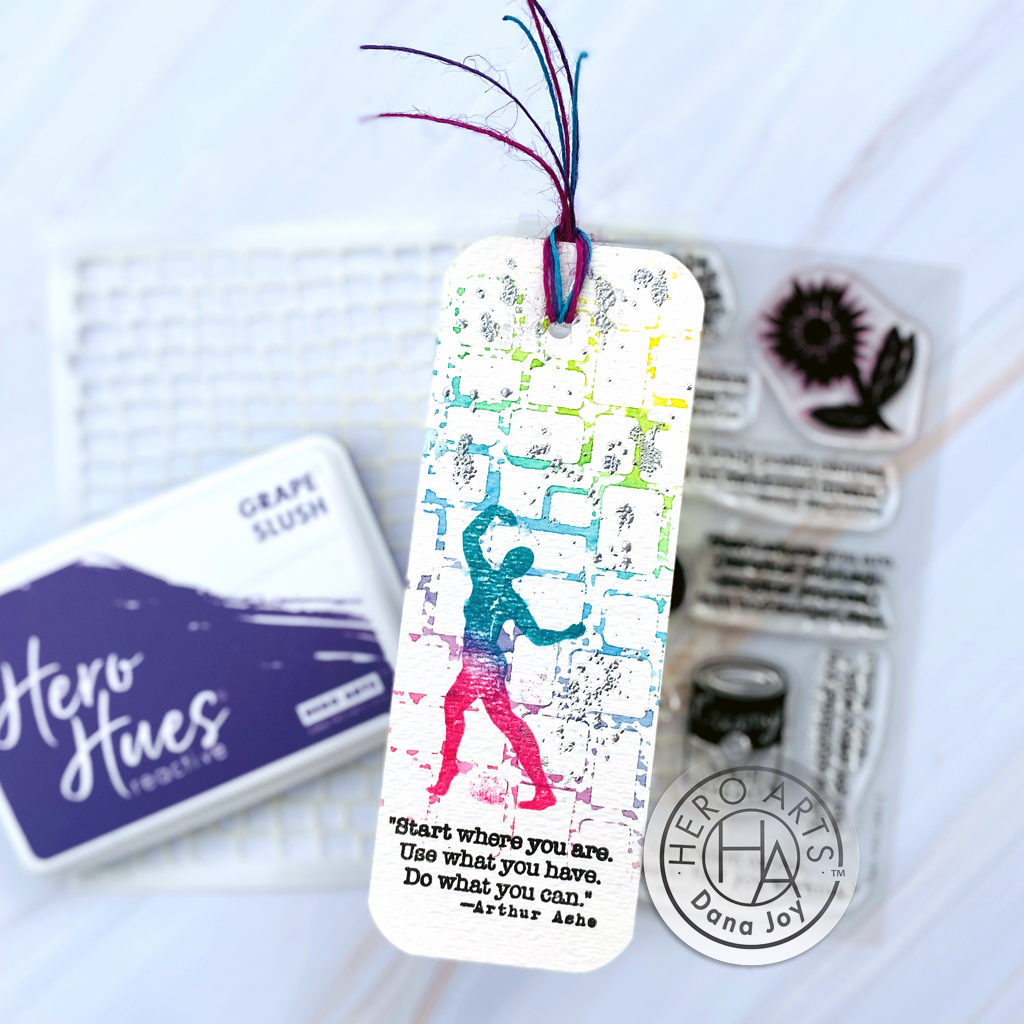
Hey everyone. Welcome to the Hero Arts My Monthly Hero release for February 2024. You should have arrived here from Rosie’s blog. Today I’m using the premium kit for my car today and this card that took me less than 10 minutes to meet. Now, with the premium kit you’re going to get everything from the classic with some extras. The extras help you to expand your creativity every single month. Let me share with you what is in the premium kit this month.
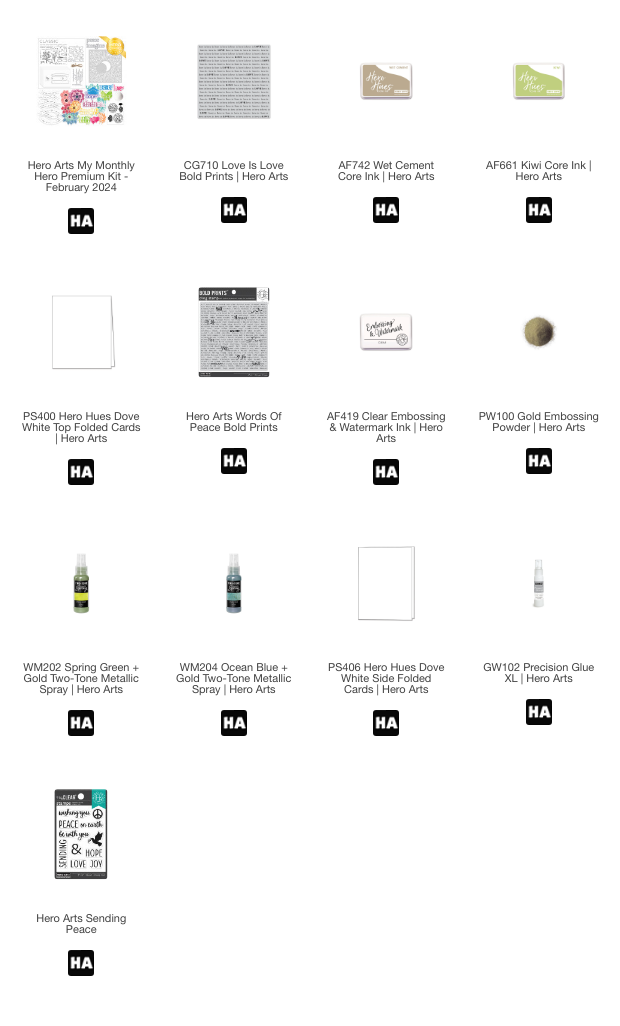
The Premium Kit includes additional elements to extend the potential for more cards and projects – even more Creativity in the Box! In addition to all the Classic Kit components, the highlight of our Premium kit includes a Radiant Sun Stencil and a whopping 48 pieces of ephemera, featuring colorful flowers, hearts, butterflies, and words. Also included is a 3″ x 4″ clear stamp filled with positive messages, word fancy dies, and embossing powder.
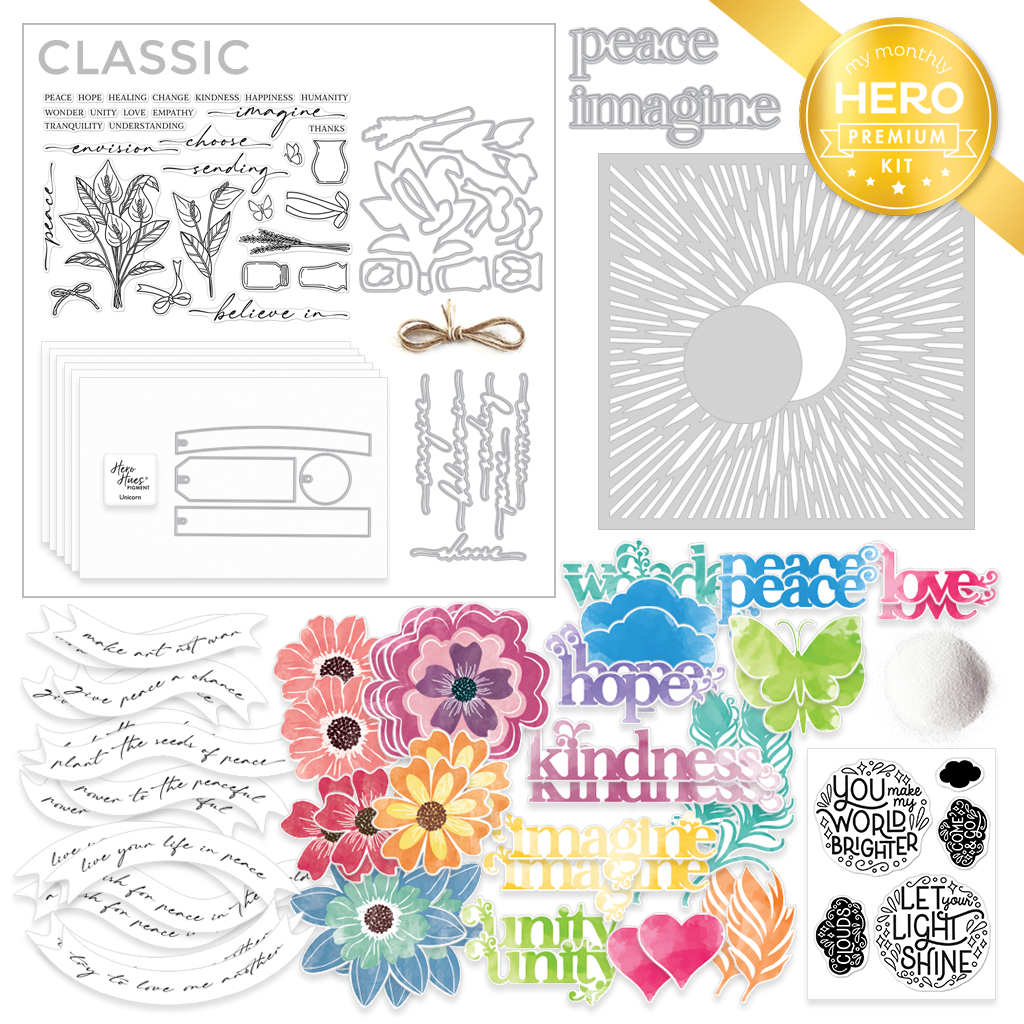
Premium Kit Contents: (Premium Elements in Bold)
• Clear Stamp Set, 6″ x 8″
• Clear Stamp Set, 3″ x 4″ • 17 Coordinating Dies
• 4 Tag Fancy Dies
• Imagine & Peace Fancy Dies
• Sun Stencil, 6″ x 6″
• 6 Sheets Premium White Cardstock, 5.5″ x 8.5″
• Unicorn Pigment Ink Cube
• Rustic Twine, 3 yards
• Ephemera Pack, 48 pieces
• White Embossing Powder, 0.5 oz.
KIT VALUE: Premium Kit: $113 Value for $49.99
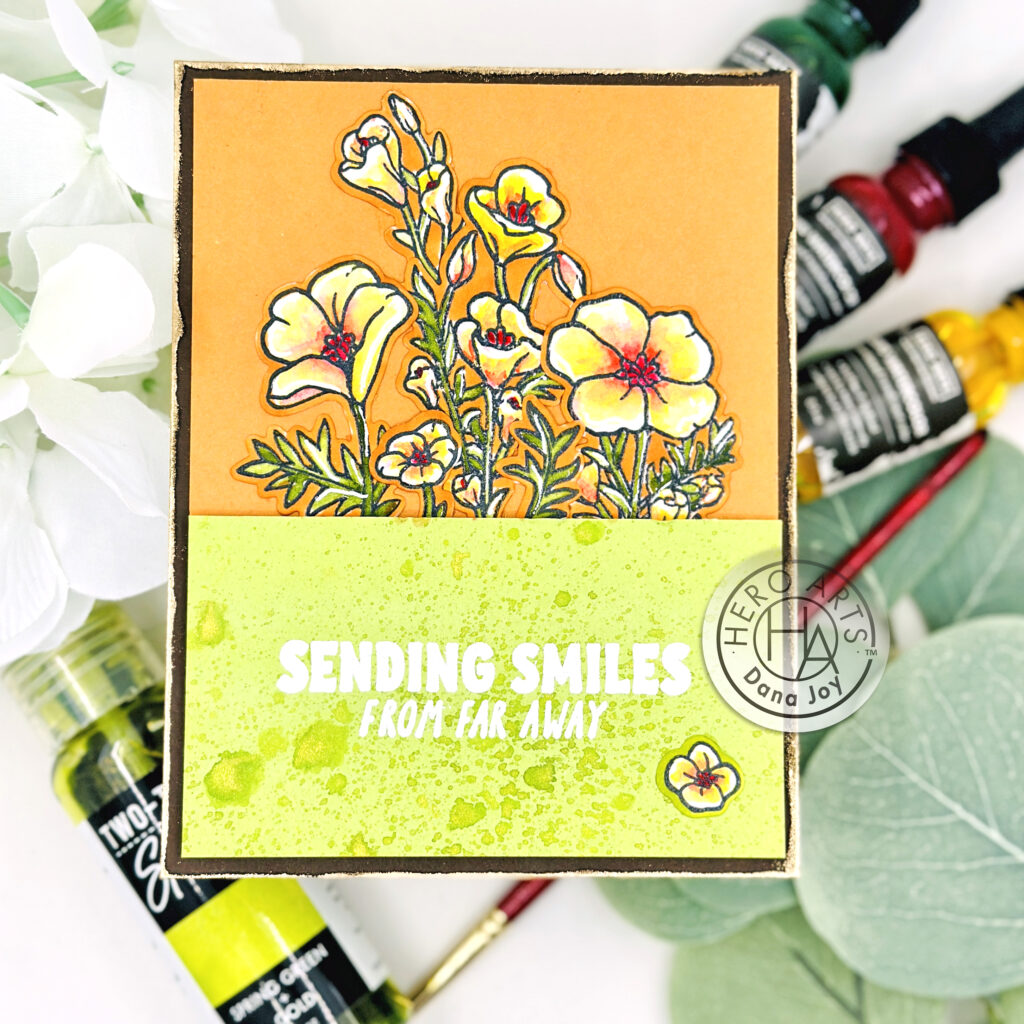
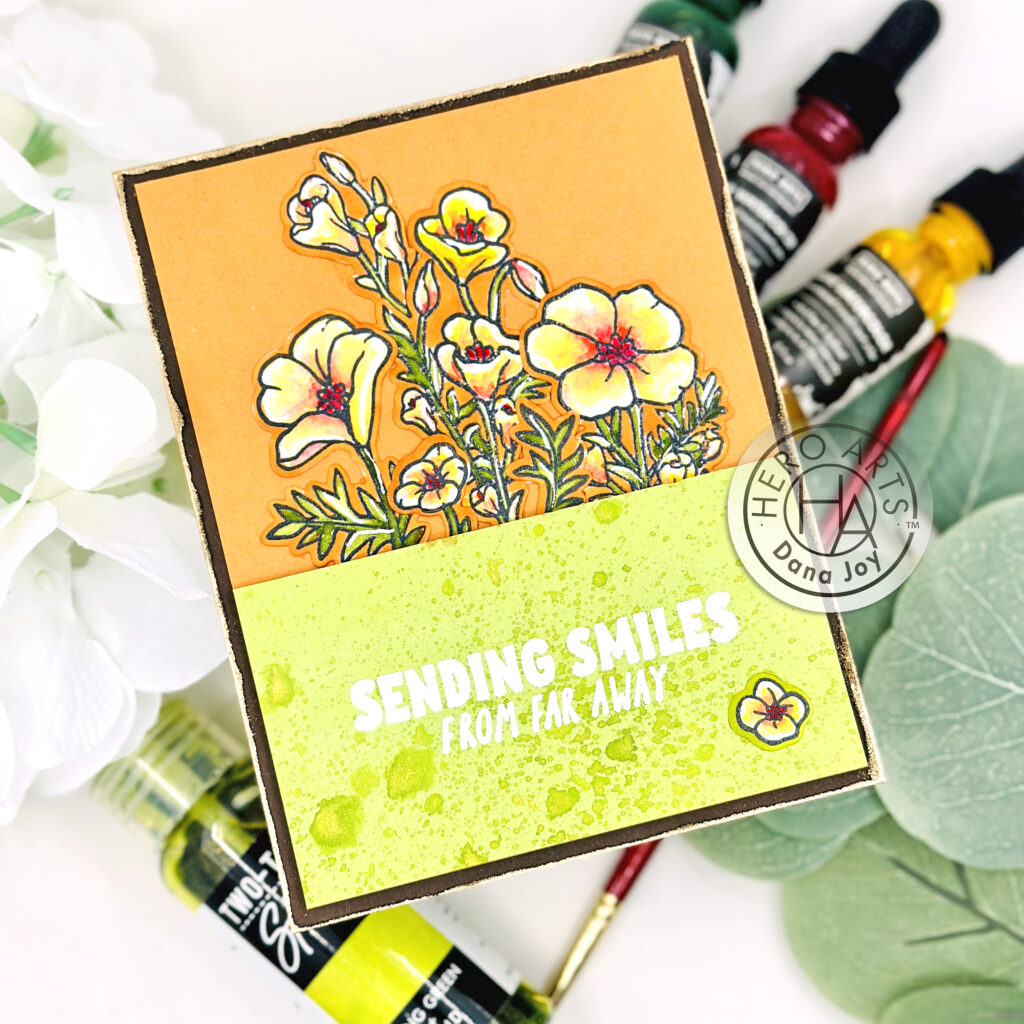
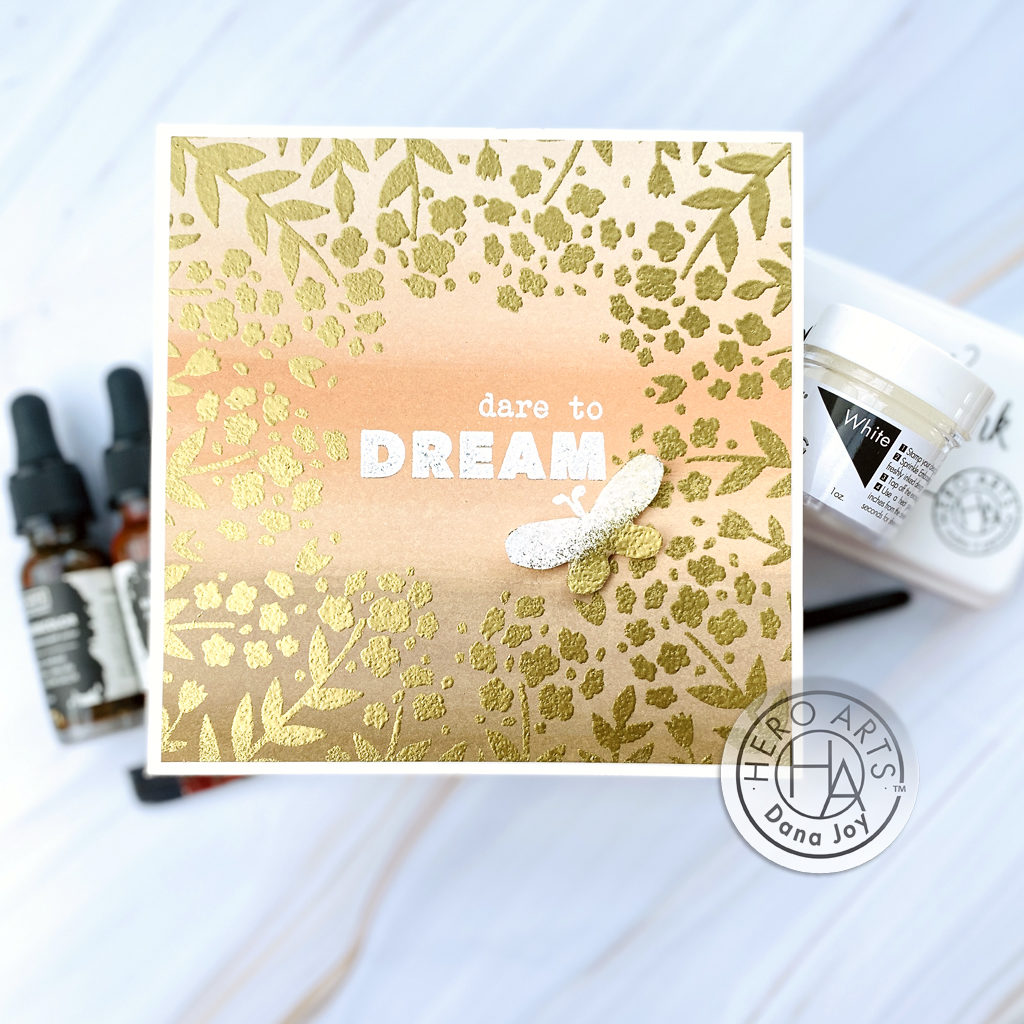
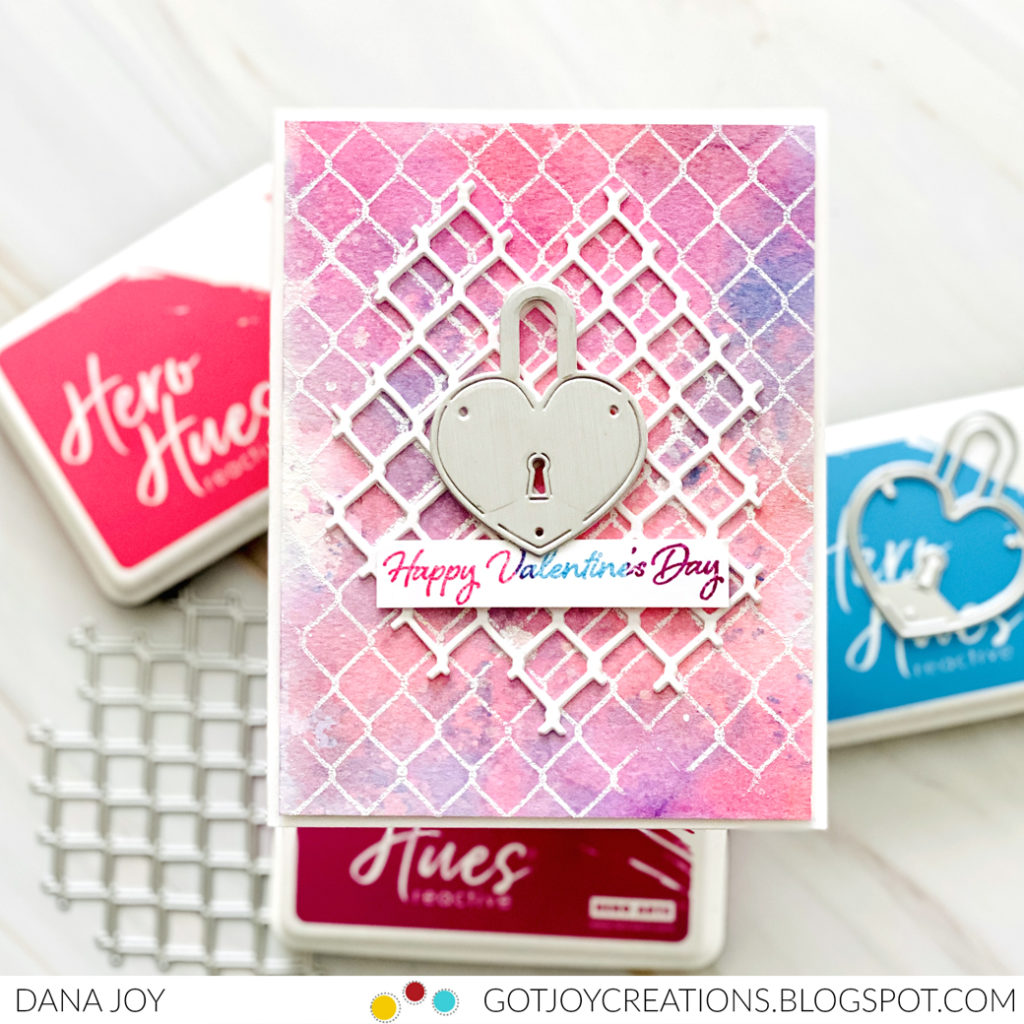
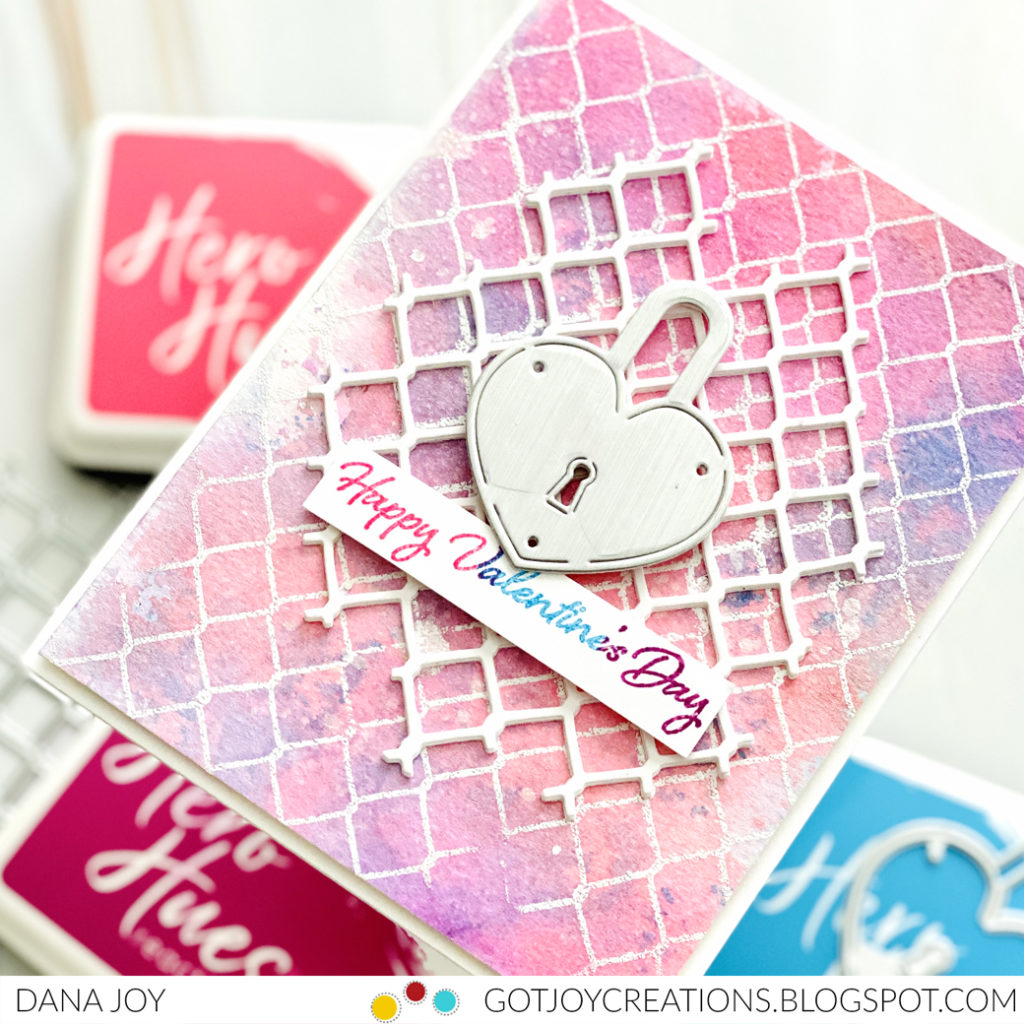
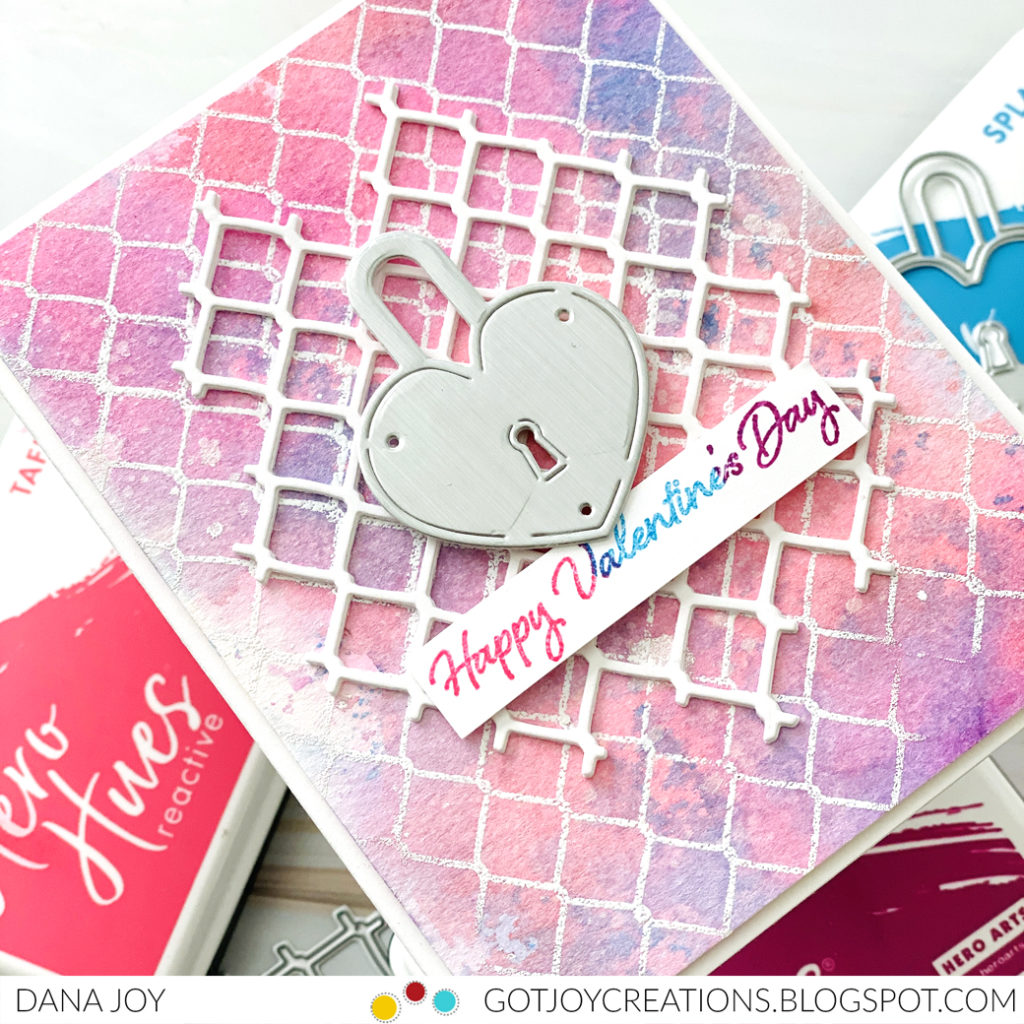
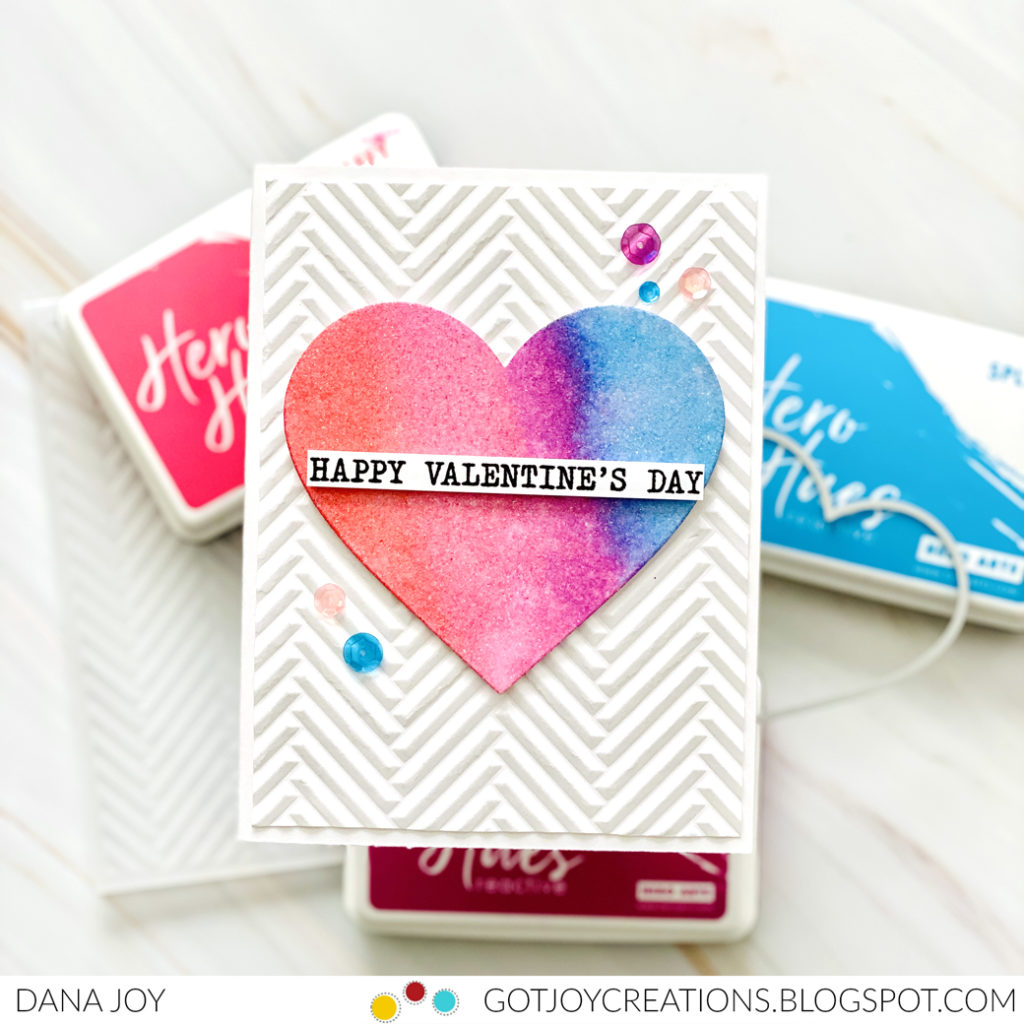
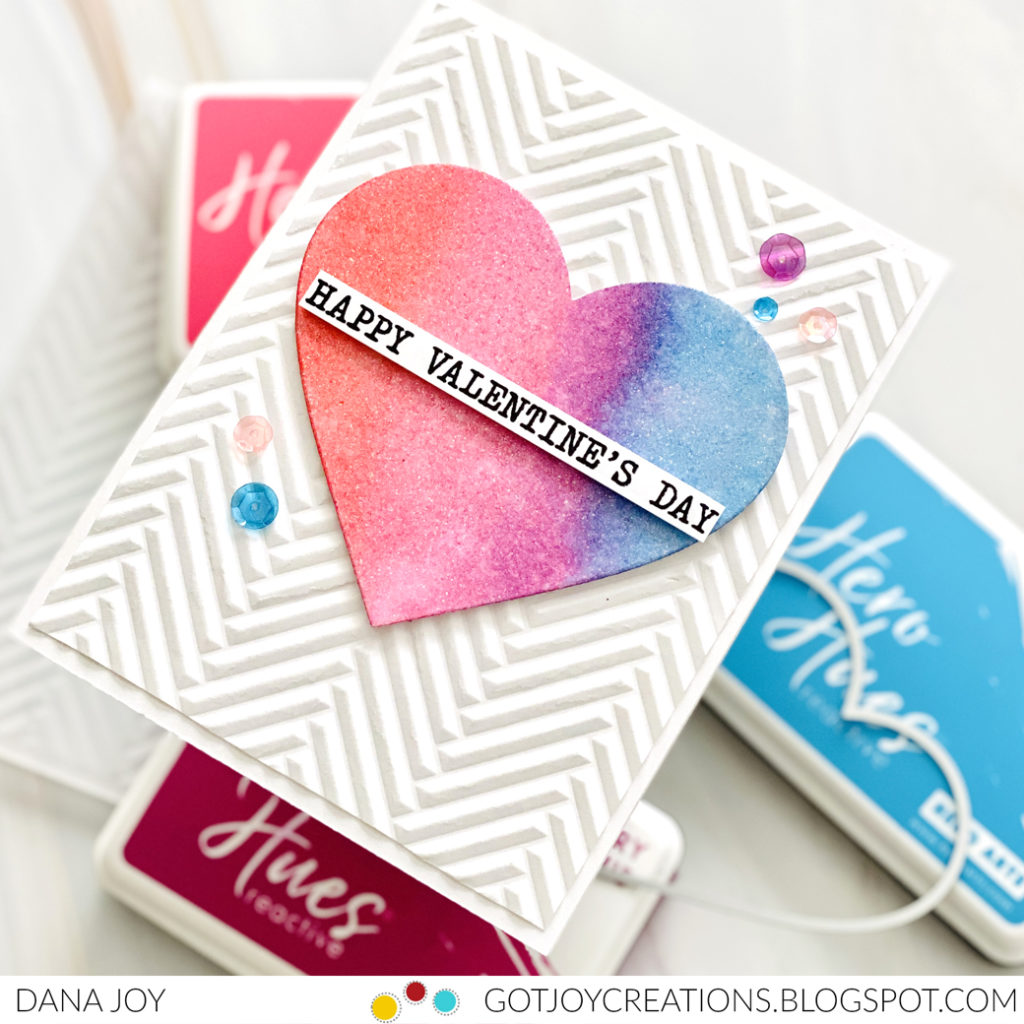
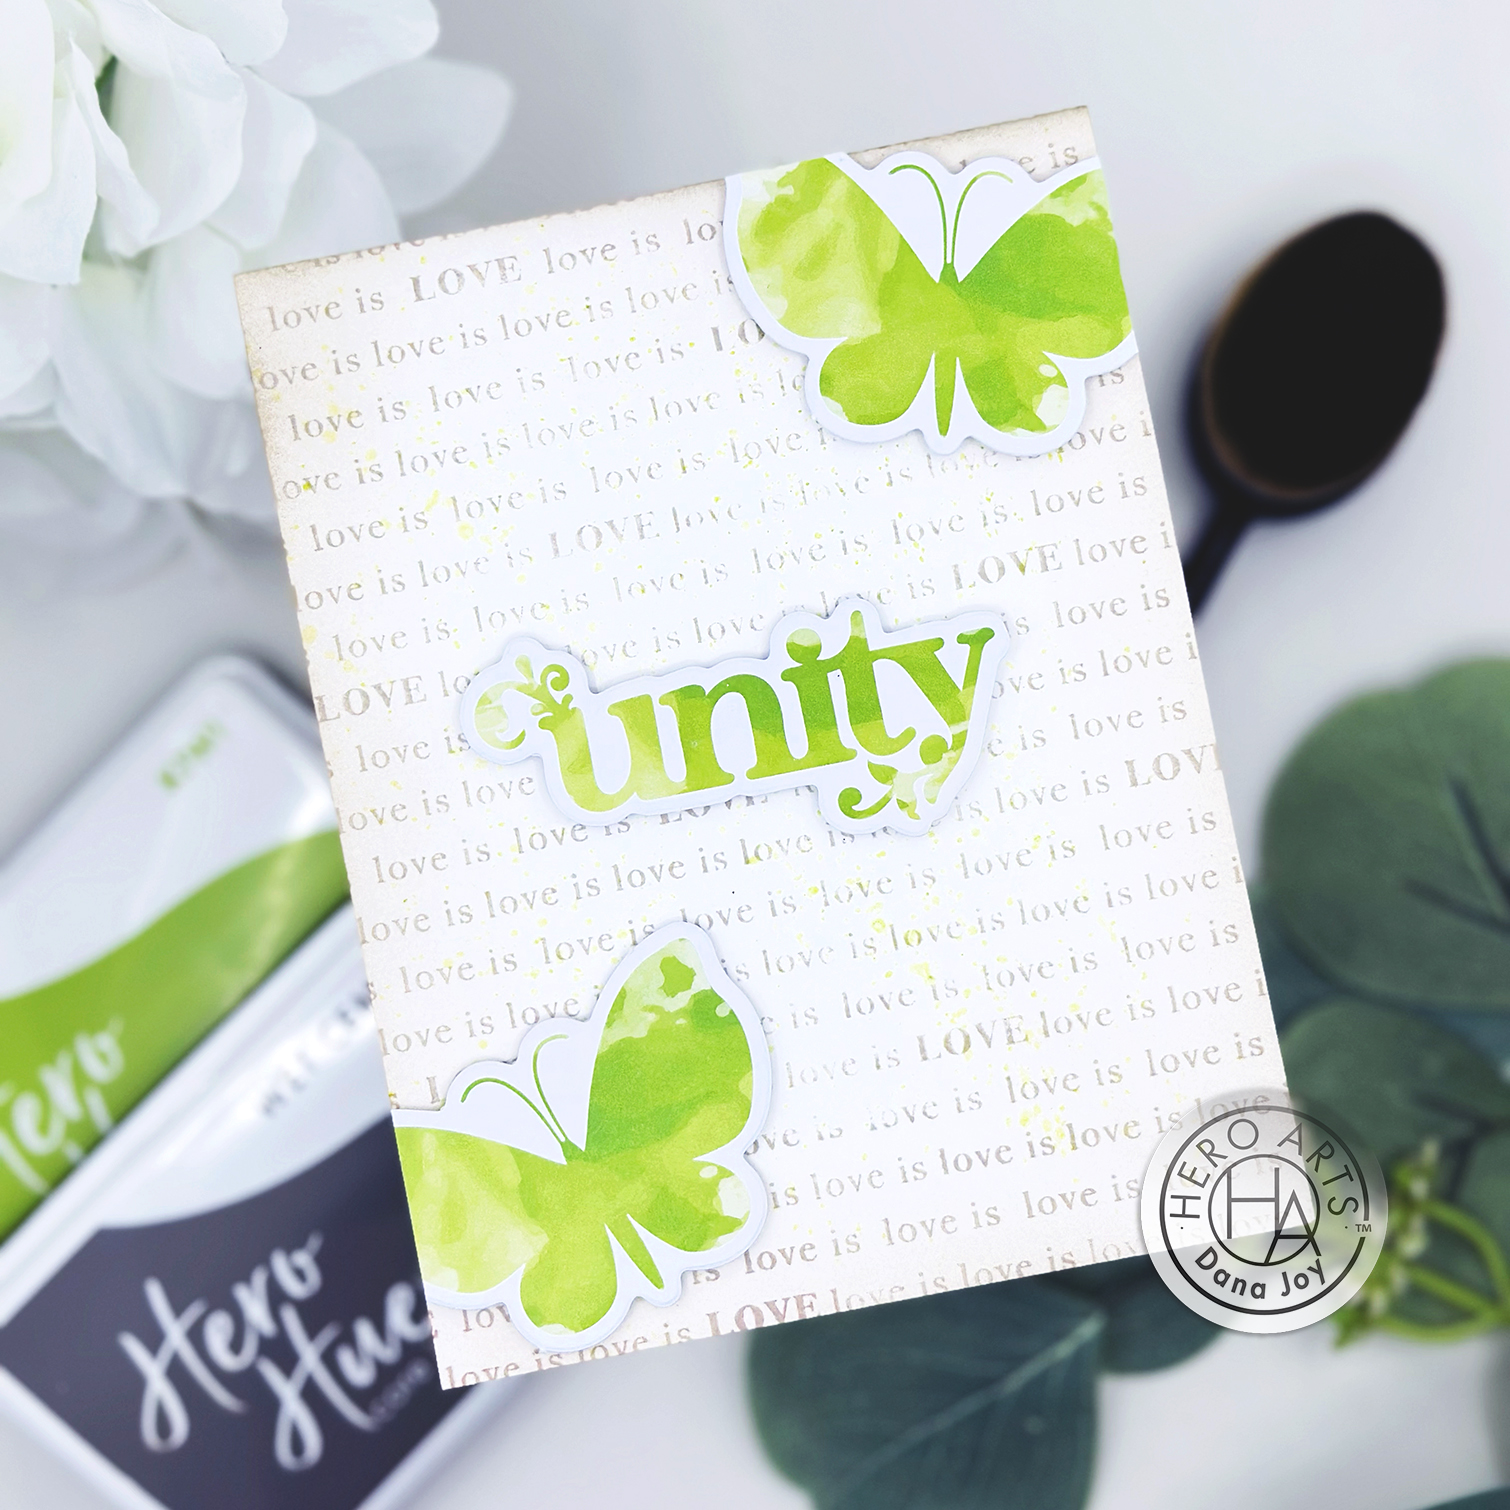
Let’s get into the cards I made for today. For my first card I have a tutorial using products from the Hero Arts My Monthly Hero Premium Kit! Using the ephemera from this kit made it super easy for me to create this card. By keeping the background super soft, the butterflies and sentiment take all the attention. Love this card.
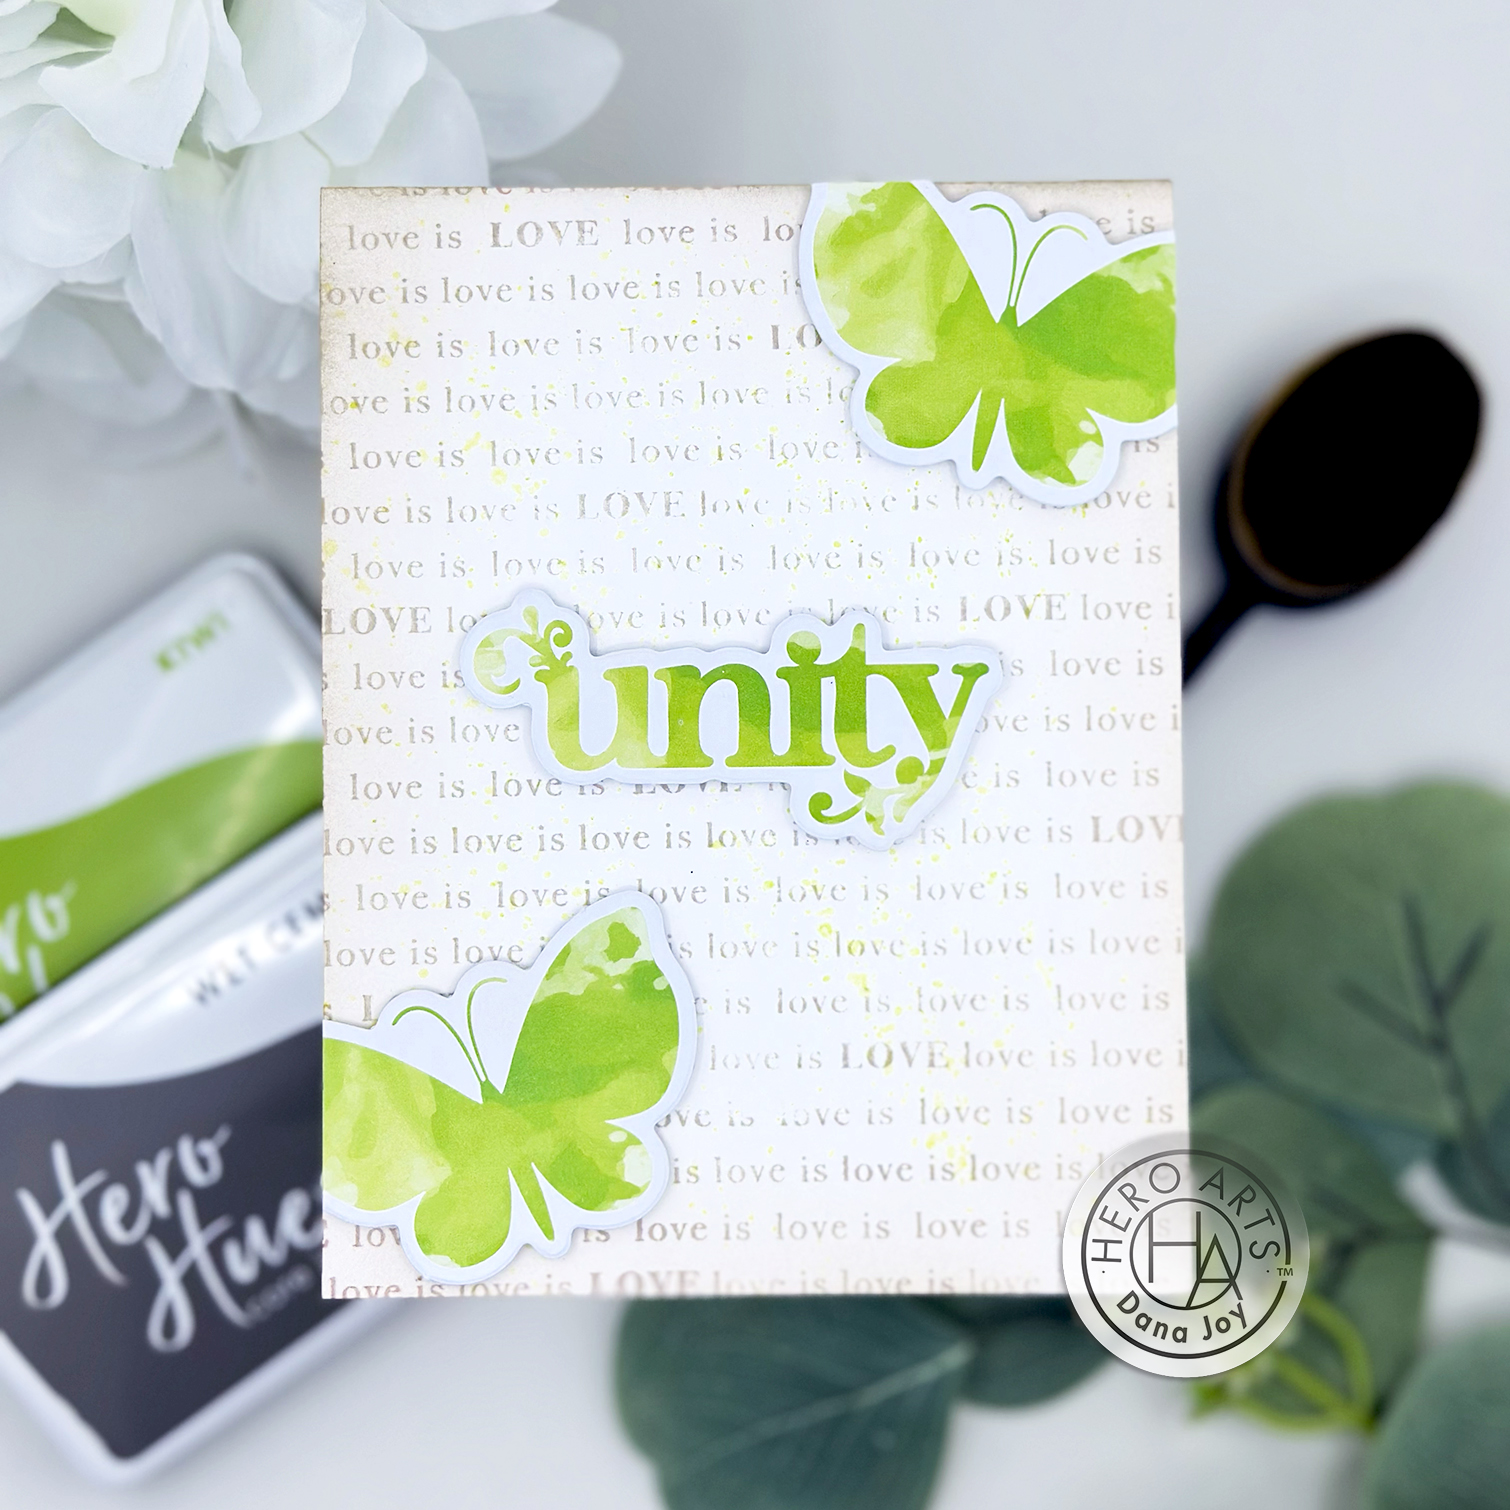
By adding in just a little bit of green splatter to the card, it pulls the green down and makes it all work so well together.
Here is the tutorial for this month’s card. You can watch it here on the blog or over on my Youtube channel @danajoy.
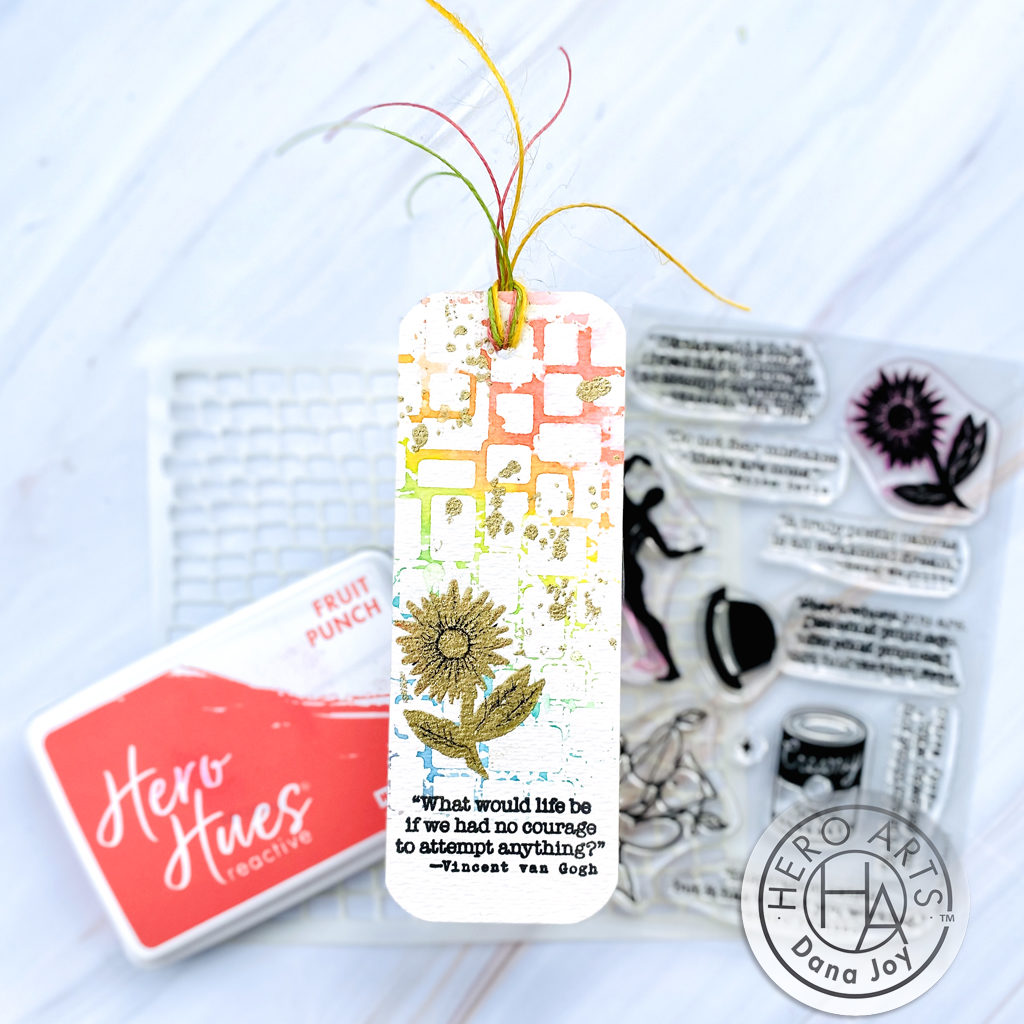
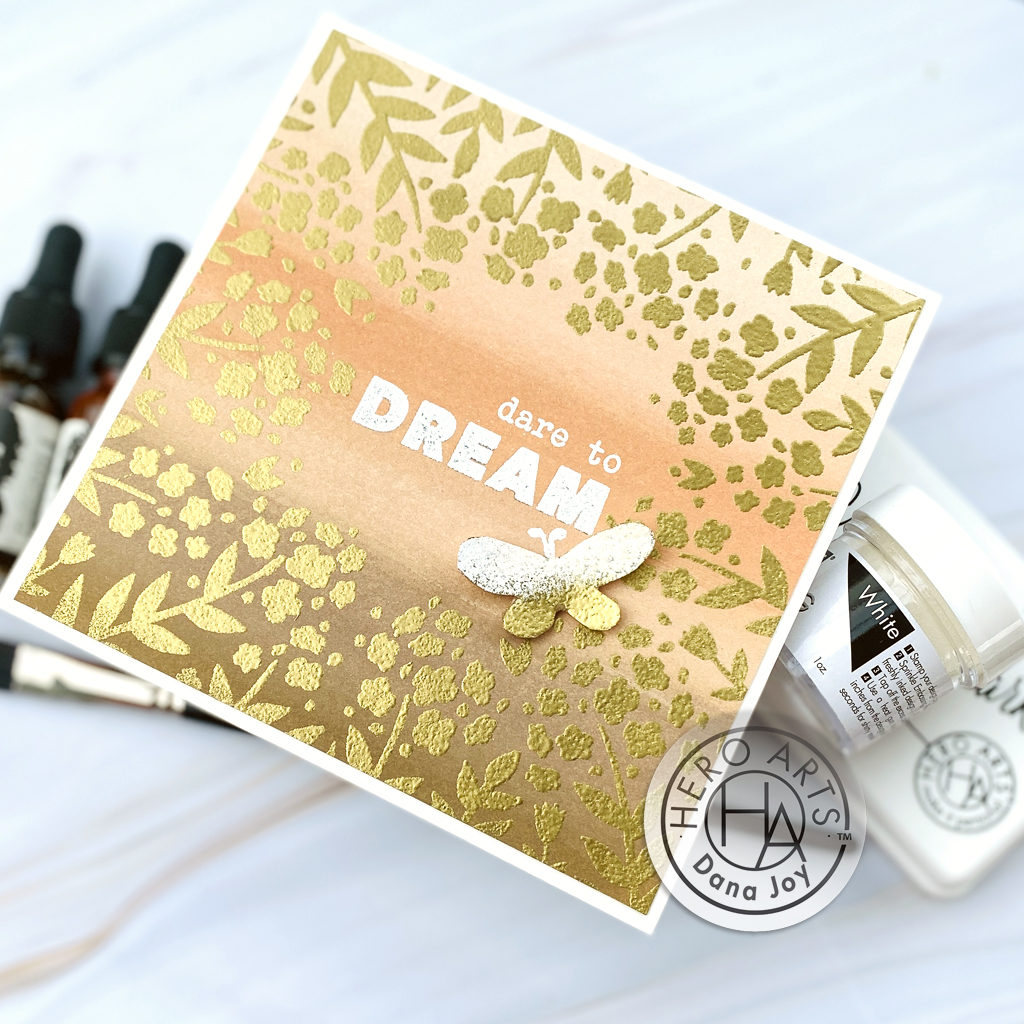
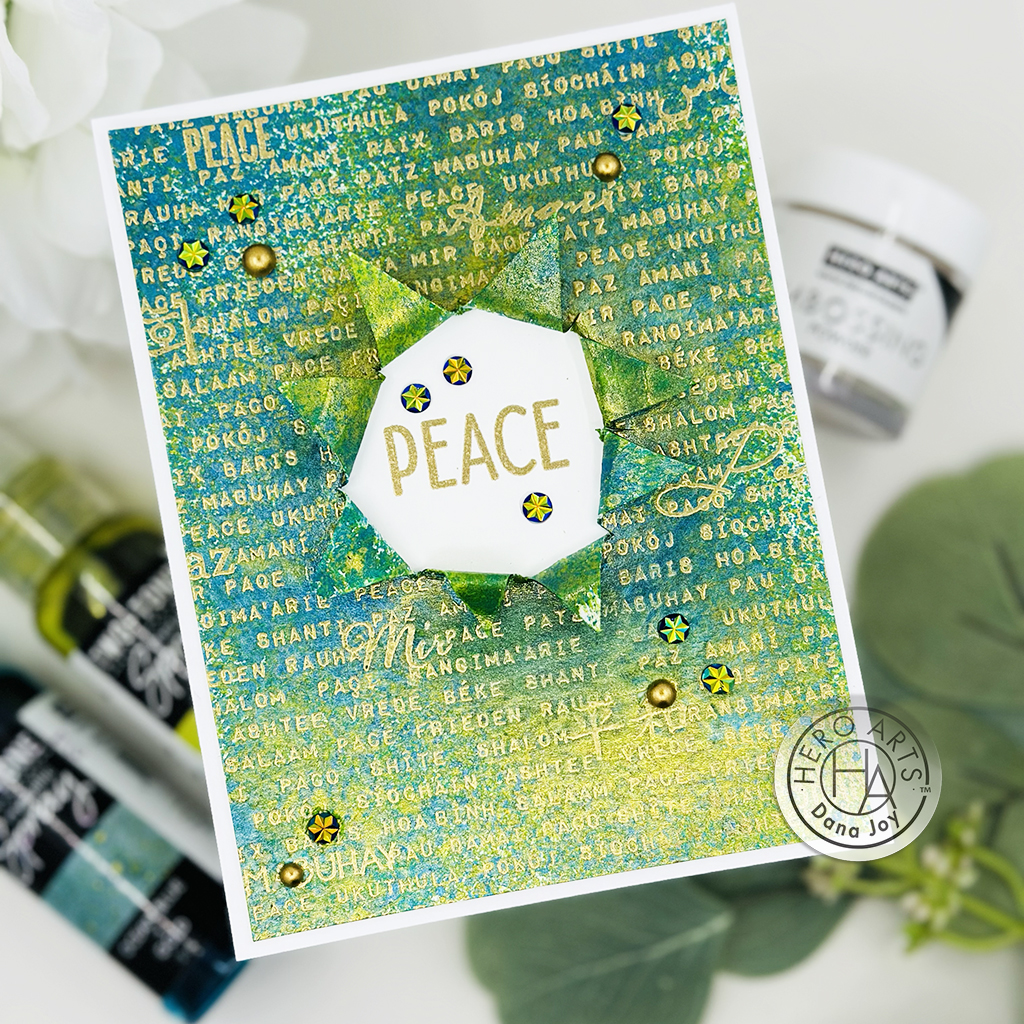
For my bonus card, I used the Words Of Peace Bold Print. This is by far my most special card I have made. Starting off with the beautiful Hero Arts Two-Tone Metallic Sprays on Dove White Cardstock really makes this card colorful. Next by stamping the bold print in Words Of Peace in embossing and watermark ink and heat setting with gold embossing powder we create a wow factor.
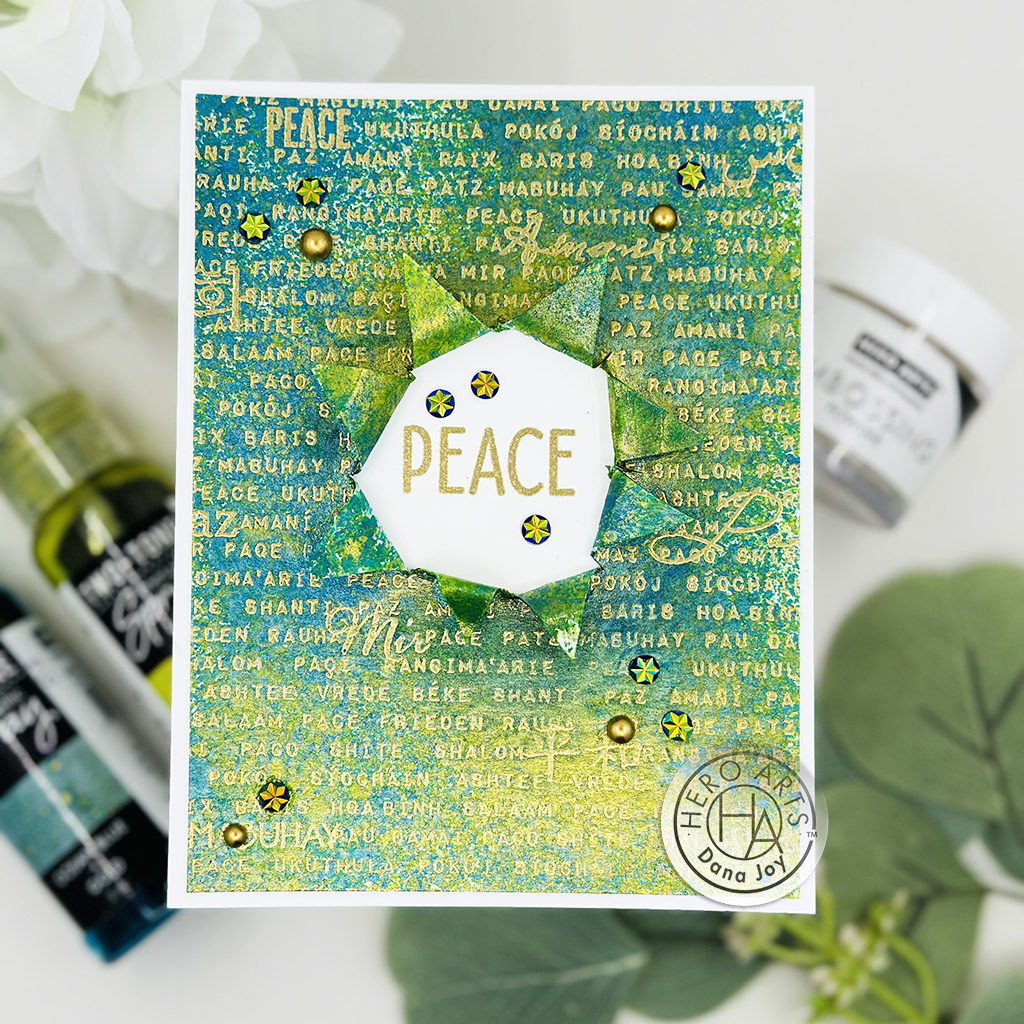
For an unexpected element, I created a hole in the center of the card and folded back the piece to look like a sun burst. Next I grabbed a white card base and centered the colorful panel on top. By doing this, I was able to create a spot to put a peace sentiment in the middle. For just a touch a glam, I added a few sparkle and gold matte gems to the card.
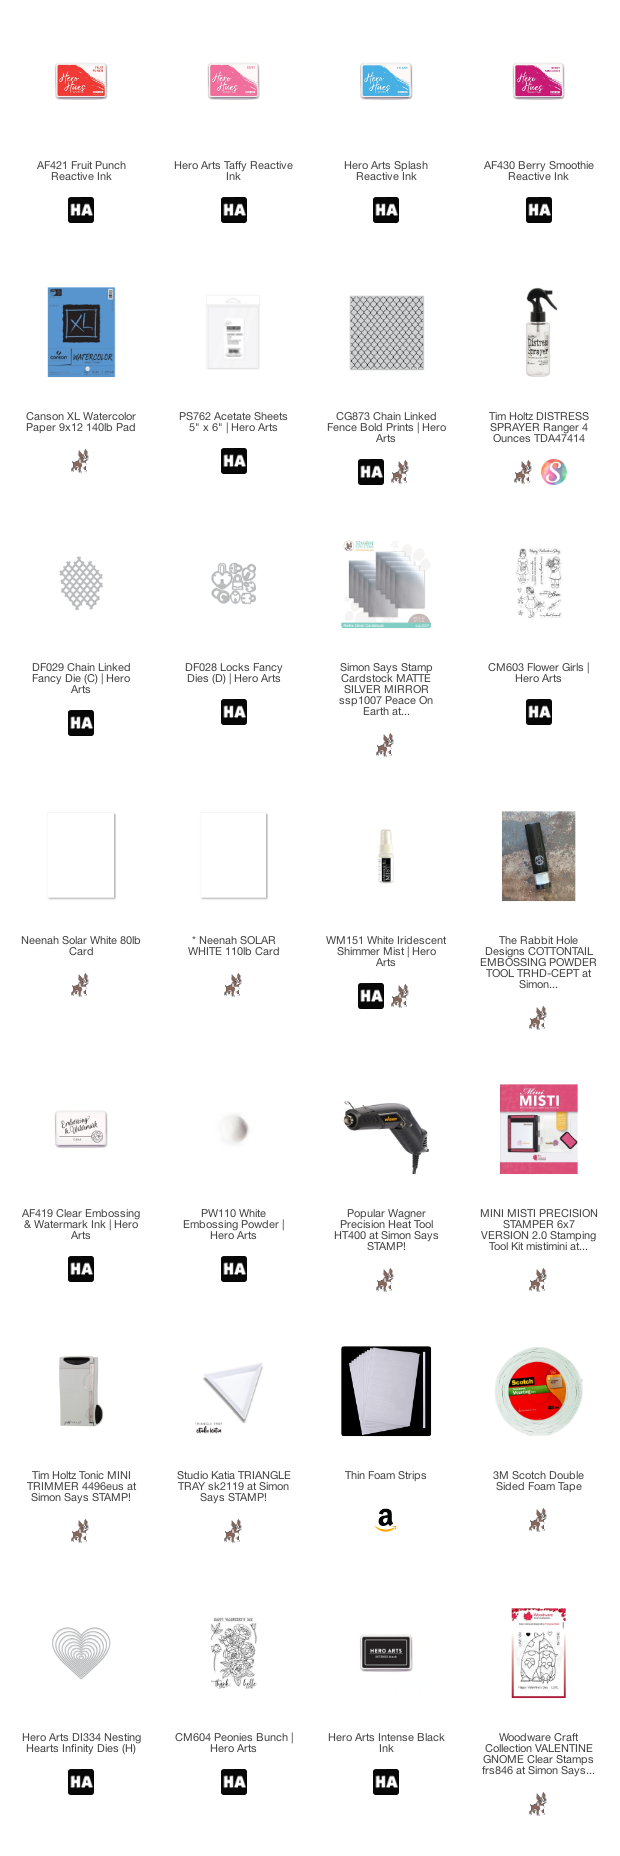
All products I used are listed below for your shopping convenience. Affiliate links have been used at no cost to you. Before I go, let’s chat about giveaways. We will give away a $50 gift card, drawn from the comments left across the hop. Enter by Sunday, February 11th at 11:59pm PT, and the winner will be announced on the Hero Arts blog the following week.
Next on the hop is Kailash. I hope you have all have a wonderful day.